
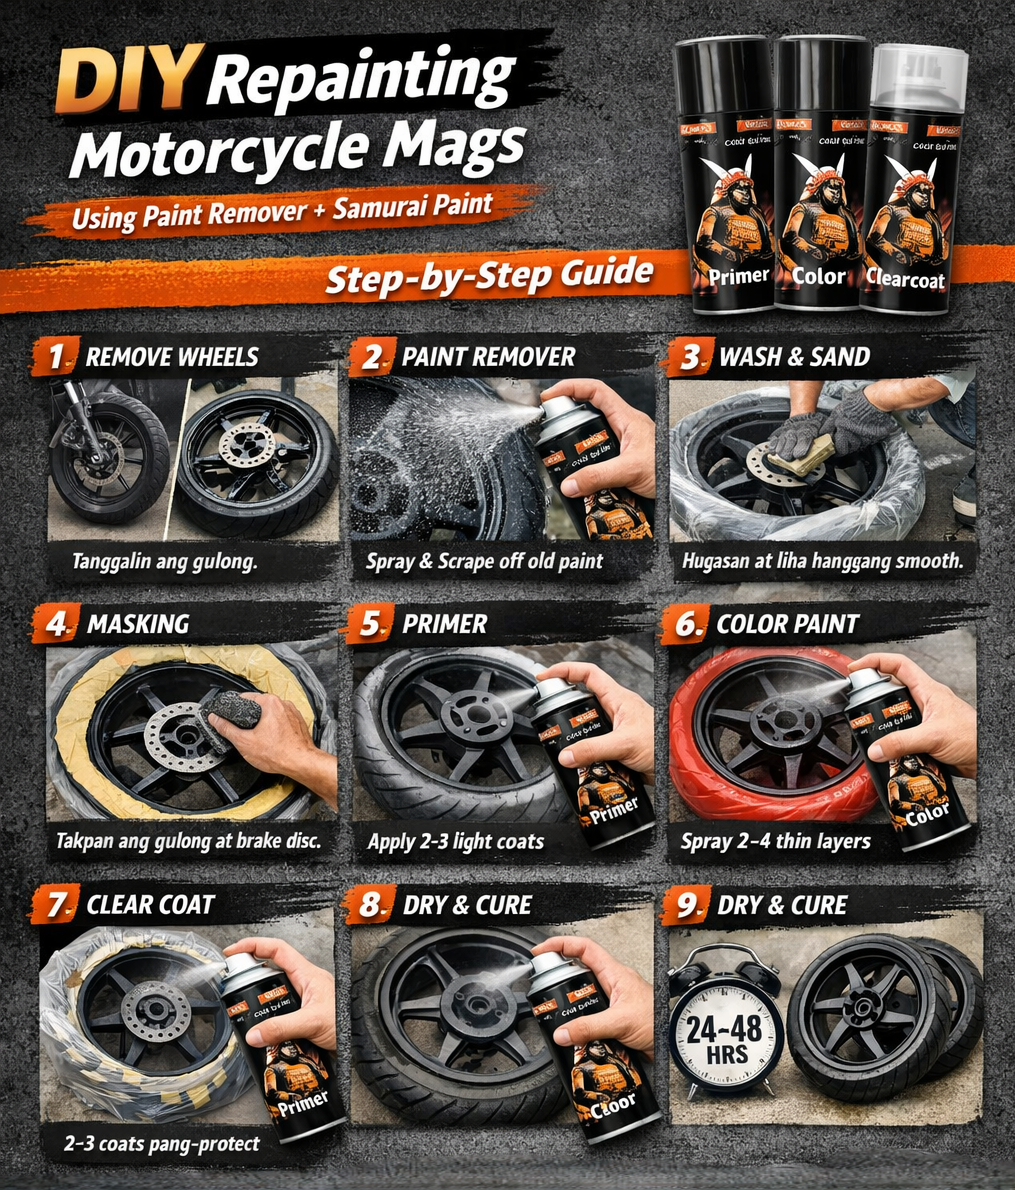
Simple Step-by-Step Guide

1. Remove the wheels (recommended)
You’ll get a much cleaner and more professional finish if you take the wheels off the motorcycle before starting.
2. Apply paint remover
Spray evenly over the wheel surface
Wait 10–20 minutes until the paint starts to bubble
Scrape or wipe off the softened paint
Repeat the process if old paint remains
3. Wash and dry
Clean the wheels thoroughly to remove chemical residue, dirt, and grease
Let them dry completely before moving to the next step
4. Light sanding
Use 400–600 grit sandpaper to level the surface
Use 800–1000 grit for smoothing and finishing prep
Wipe off all dust after sanding
5. Masking
Cover areas you don’t want painted such as tires and brake discs
6. Primer (Samurai Paint)
Apply light coats (2–3 layers)
Wait 10–15 minutes between each coat
This helps paint stick properly and last longer
7. Color paint (Samurai Paint)
Spray thin, even layers instead of thick coats
Apply 2–4 coats for full coverage
Rotate the wheel while spraying to avoid uneven spots
8. Clear coat (Samurai Paint)
Apply 2–3 protective layers
Choose between glossy or matte finish depending on preference
9. Drying
Let the wheels cure for 24–48 hours before using the motorcycle
Quick Tips
Avoid thick coats to prevent drips and uneven texture
Work in a shaded, dust-free environment
Multiple thin layers always give a smoother finish than one heavy coat
Final Result
With proper preparation and patience, you can achieve a clean, factory-like finish on your motorcycle mags—all done DIY and on a budget.